After the first introductory article about MiniIDE, we will now show you how to configure, install and use the new interface for Color.1) LED e Jumpers
The new interface has only one indicator led, which serves both to indicate that the interface is powered on and functional (lit led) and also to show read or write activity (blinking led).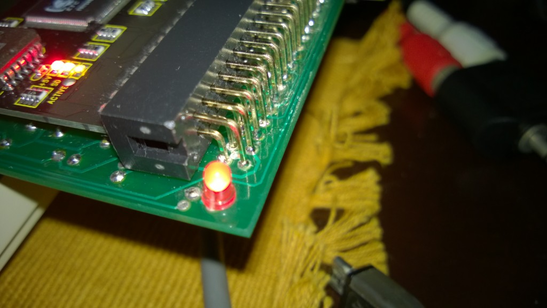
The MiniIDE also has 4 jumpers on the board for specific settings. The first one is the jumper for selecting the hardware addresses $FF70 or $FF50. In the first revision of the Glenside IDE (shown in the previous article) only the $FF70 address was used, but it was discovered that this address conflicted with the address of the Tandy Multipak interface, so a new revision of the board was created with a jumper to set also to the $FF50 address so as not to conflict with MPI. In MiniIDE, this jumper will be set by default to $FF50 because the ROM used in the interface is already set to this address.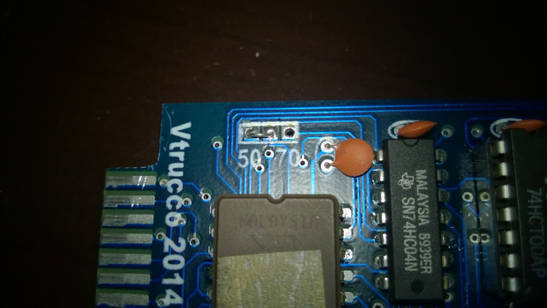
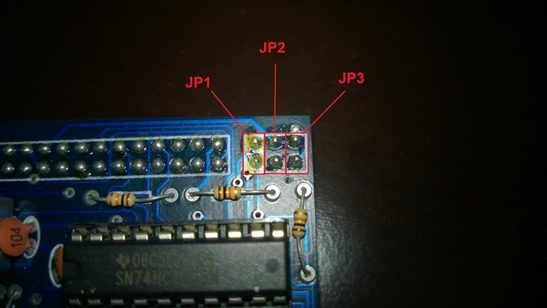
At one end of the board there is a set of 3 jumpers (image below). JP1 is used to select the CART function, i.e., if this jumper is closed the IDE can be used as a simple program cartridge (provided that the original EPROM is replaced). The EPROM used in the MiniIDE is a 27C256 and allows up to 32Kb of data. The standard ROM of HDB-DOS is only 8Kb, that is, 24Kb were left over. In order not to waste this space we decided to put in addition to the HDB-DOS LBA own IDE, also put the ROM versions of HDB-DOS for use with Drivewire (program for PC emulation of drives for Color and that is used through connection through the serial port), so those who still do not have available an IDE drive, IDE-CF adapter, etc. can always use the MiniIDE as a simple connection cartridge for Drivewire. Here is the link to the official Drivewire 4 website.In summary, closed JP2 selects for initial loading the DW ROM specific for use with a CoCo1 (or CP-400, Color 64), closed JP3 selects the ROM for CoCo2 (or MX-1600), in case both JP2 and JP3 are closed, the ROM for CoCo3 is selected.
2) Preparation of the CF/SD
As I said in the last article, there is already an image for use in CF/SD ready, and with all the best for the platform. Therefore, I will now exemplify the steps to record this image on a CF or SD card. The package containing the image itself and a text file describing its contents can be downloaded here.First you will need to get a CF or SD of 512Mb or larger. Then you need to connect it to a PC using a USB card adapter that is available at any corner. In the case of SD, most newer laptops already have a reader for them.
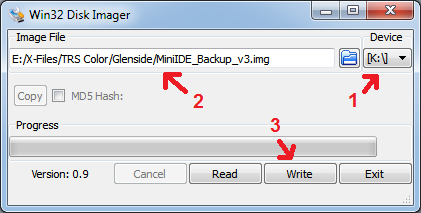
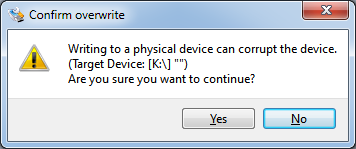
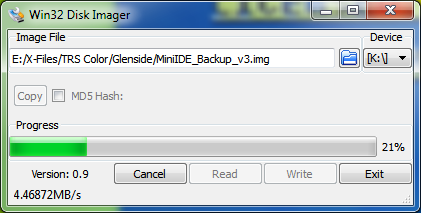
Then you should download the Win32 Disk Imager utility, because with it you can write the image to the CF / SD using a Windows PC.Then install the program on your PC and follow the steps below:
3) Mounting the CF/SD on the MiniIDE
For mounting the CF or SD I recommend using the adapters below, as these have been tested and I can assure you that they work perfect. I do not mean that other adapter models do not work, but that only have not been tested.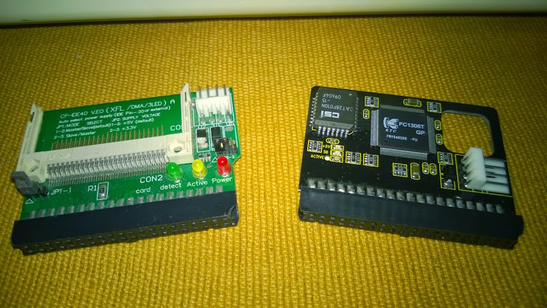
In the case of the SD adapter in particular, there is an important warning that everyone who uses it should follow to avoid problems. As seen in the photo below, the metal part of the SD adapter is practically touching the contacts of some ICs on the MiniIDE board.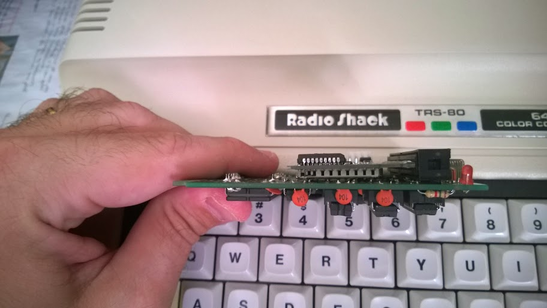
Seen this, I strongly recommend anyone who is using a similar SD adapter, that protect the metal part of the adapter with some insulating material. I here used common insulating tape to avoid any contact with the MiniIDE.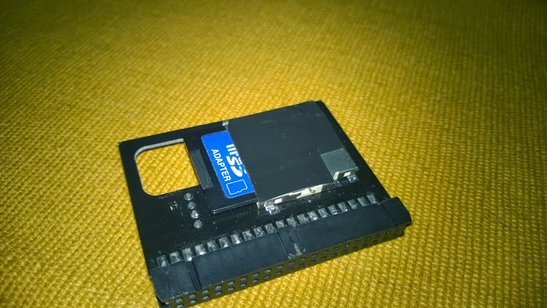
In the case of the recommended CF adapter, there is no such problem because it is well away from the MiniIDE card and in this case no action is required.After these security measures, just put the CF/SD previously created in step 2 and use.
4) Using the MiniIDENow I will briefly explain the basic use of MiniIDE with the image provided and which is the creation of friend Felipe Antoniosi (Retro Canada).
After booting, the following screen will appear showing the boot options and the countdown timer that will start one of the available NitrOS-9 (according to the machine on which it is being loaded) if nothing is chosen.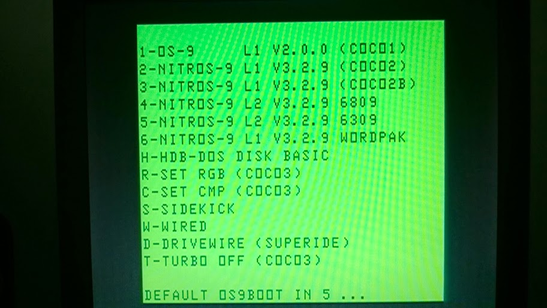
Brief description of the initialization options:
1- Load the original OS-9 Level 1 version for the Color Computer that was created by Microware and distributed by Tandy.
2- Load the Nitros-9 version for Color Computer 2 (This is the default load for CP-400 if no option is chosen).
3- Special version of Nitros-9 L1 made to run exclusively on the CoCo2B, which has lowercase support.
4- Load the Nitros-9 Level 2 version for CoCo3.
5- Nitros-9 L2 version specifically made to run on CoCo3 using Hitachi 6309 processor.
6- Loads Nitros-9 L1 with support for the use of the Wordpak board, made by Felipe Antoniosi.
H- This option only loads the simple HDB-DOS (BASIC).
R- Set the CoCo3 color palette to RGB output.
C- Set the CoCo3 color palette for composite video output.
S- Load the Sidekick loader used to load programs/games into the disk partitions.
W- Load the Wired program, used to transfer disk images (DSKs) between the MiniIDE and the Drivewire.
D- Used to load the Drivewire in the Cloud-9 SuperIDE (not used in the MiniIDE).
T- This option enables or disables Turbo mode (2Mhz) on the CoCo3.I will not go into depth here on the use of OS-9/Nitros-9. If you are interested in exploring this excellent OS, I suggest you read the documentation here.
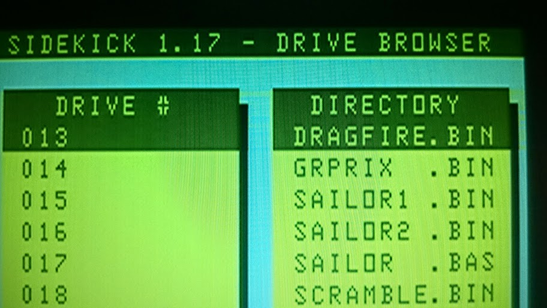
4.1) SidekickEssentially the prepared image has its contents divided between OS-9/Nitros-9 partitions and HDB-DOS partitions. These HDB-DOS partitions are the same size as the original floppy disks used in Color, and HDB-DOS itself can work with up to 254 partitions. That said, the simple way in HDB-DOS to navigate between partitions is to type DRIVE #, where # would be the specific partition number to be accessed. Thinking of an easier way to navigate and execute programs between the various partitions, Felipe Antoniosi came up with a little program, Sidekick.
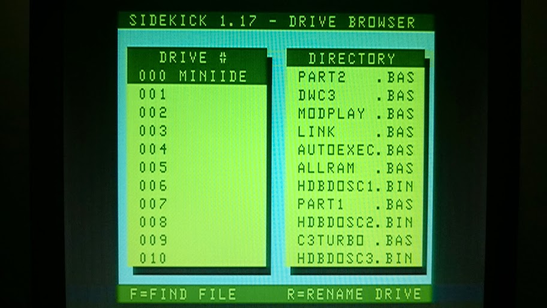
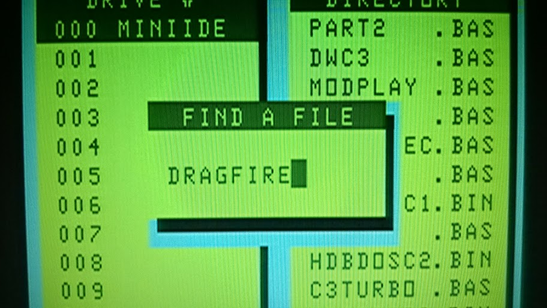
This program allows, in a simple way, to search for programs by name (by typing F) or simply by typing directly the number of the desired drive (A complete list of the programs contained in the HDB-DOS partitions can be found in the TXT file accompanying the image package).
In the left window are the drives (partitions) and in the right window the contents of the currently selected drive.
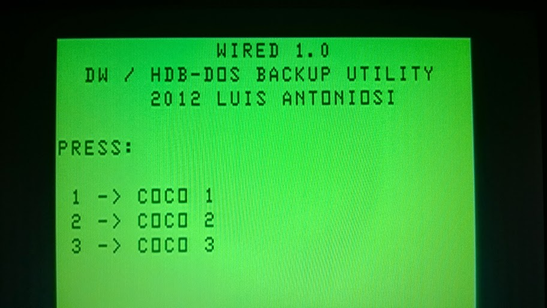
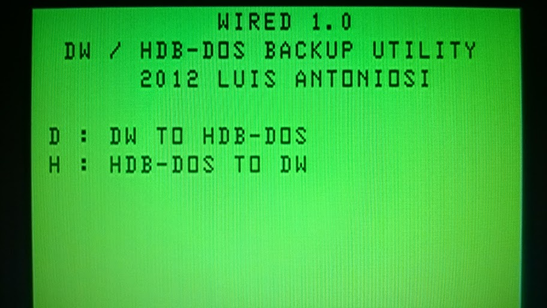
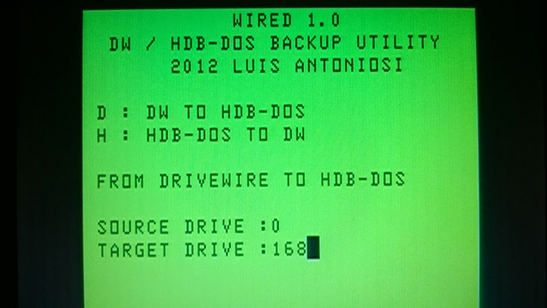
4.2) Wired
Wired is another program created by Felipe that allows copying entire disk images (DSKs) to HDB-DOS partitions and vice versa using Drivewire. That is, it is a practical way to transfer files between the MiniIDE and a PC with Drivewire installed.To perform the transfer between the Color and the PC, you must already have all the Drivewire structure assembled (serial communication cable between the Color and the PC, Drivewire installation on the PC, configuration, etc.). I will not go deeper here in the characteristics and operation of Drivewire, who wants to know more has all documentation here.
5) Conclusion
I hope this tutorial will be useful to those who are exploring this new world that MiniIDE is bringing to the CP-400 and to the other national Color.Feel free to suggest any improvement or correction in this document. For those who still have questions or are interested in tips for a more "advanced" use of MiniIDE, I suggest subscribing to the two channels related to the subject TRS Color in Brazil:
Clube Color Brasil on Facebook
You can see the original article (in portuguese) by Daniel Campos here